Whole Foods Pizza Dough: A Comprehensive Cooking Guide
Embark on a delightful culinary journey! Discover the secrets to crafting exceptional homemade pizza, effortlessly, with simple ingredients and expert guidance for fantastic results.
Understanding Whole Foods Pizza Dough
Whole Foods pizza dough offers a convenient starting point for homemade pizza, prized for its simplicity and consistent quality. Unlike some pre-made options, it’s crafted with relatively few ingredients, allowing for a focus on flavor. Many home cooks appreciate its ability to deliver a satisfying crust without extensive kneading or proofing times.
However, understanding its characteristics is key to success. It’s generally a slightly denser dough compared to traditional Neapolitan styles, benefiting from proper handling and shaping techniques. Recognizing this allows you to adjust your approach, ensuring a beautifully textured and flavorful pizza. It’s a fantastic base for experimentation with toppings and baking methods!
Ingredients Breakdown & Quality
Whole Foods pizza dough typically contains just a handful of ingredients: flour, water, yeast, olive oil, and salt; The quality of these components significantly impacts the final product. While the exact flour type isn’t always specified, it’s often a blend suitable for a versatile crust.

The olive oil contributes to flavor and elasticity, while the yeast provides the necessary lift. Salt controls yeast activity and enhances taste. Whole Foods emphasizes simpler ingredient lists, often avoiding artificial additives or preservatives. This commitment to quality translates to a cleaner-tasting dough, providing a solid foundation for your pizza creations and allowing toppings to truly shine.
Preparing Your Workspace & Tools
Before beginning, ensure a clean and spacious workspace. Lightly flour a clean, flat surface – a countertop or large cutting board works well – to prevent sticking. Essential tools include a large mixing bowl, measuring cups and spoons, and a bench scraper for handling the dough.
A kitchen scale provides the most accurate measurements, though cups and spoons are acceptable. For shaping, consider a pizza peel or baking sheet. Having a clean damp cloth nearby is helpful for wiping surfaces. Proper preparation streamlines the process, making dough handling easier and more enjoyable, ultimately contributing to a superior pizza experience.
Step-by-Step Dough Preparation
Begin by activating the yeast, if required by your recipe, in warm water with a pinch of sugar. Combine the flour, salt, and activated yeast (or dry yeast directly, if the recipe allows) in a large mixing bowl. Gradually add water, mixing until a shaggy dough forms.
This initial stage focuses on hydration. Next comes kneading – crucial for gluten development. Once kneaded, the dough needs to rise in a warm place, covered, until doubled in size. This proofing process develops flavor and texture. Following these steps carefully ensures a successful and delicious pizza base.
Mixing the Dough – Initial Stage
Start with warm water – not too hot, or it will kill the yeast! – and dissolve the yeast with a teaspoon of sugar. In a large bowl, combine the Whole Foods pizza dough flour and salt. Create a well in the center and pour in the yeast mixture and olive oil.
Gradually incorporate the flour into the wet ingredients, mixing until a shaggy dough forms. Don’t overmix at this stage; focus on hydration. The dough will appear rough, but that’s perfectly normal; This initial mix sets the foundation for gluten development in the next phase.
Kneading Techniques for Optimal Gluten Development
Transfer the shaggy dough onto a lightly floured surface. Knead using a push-turn-fold motion, applying consistent pressure. Initially, the dough will be sticky, but it will become smoother and more elastic with continued kneading.
Knead for 8-10 minutes, developing the gluten structure. A well-kneaded dough will pass the windowpane test – you should be able to stretch a small piece thin enough to see light through it without tearing. Proper kneading is crucial for a chewy, flavorful crust, ensuring optimal texture and rise.
First Rise: Proofing the Dough
Place the kneaded dough into a lightly oiled bowl, turning to coat. Cover with plastic wrap or a damp towel, and let it rise in a warm place for 1-2 hours, or until doubled in size. This initial proofing allows the yeast to ferment, developing flavor and creating air pockets.
The rising time will vary depending on room temperature. Gently punch down the dough to release the air, and it’s now ready for shaping. Proper proofing is essential for a light, airy, and delicious pizza crust, enhancing both texture and taste.
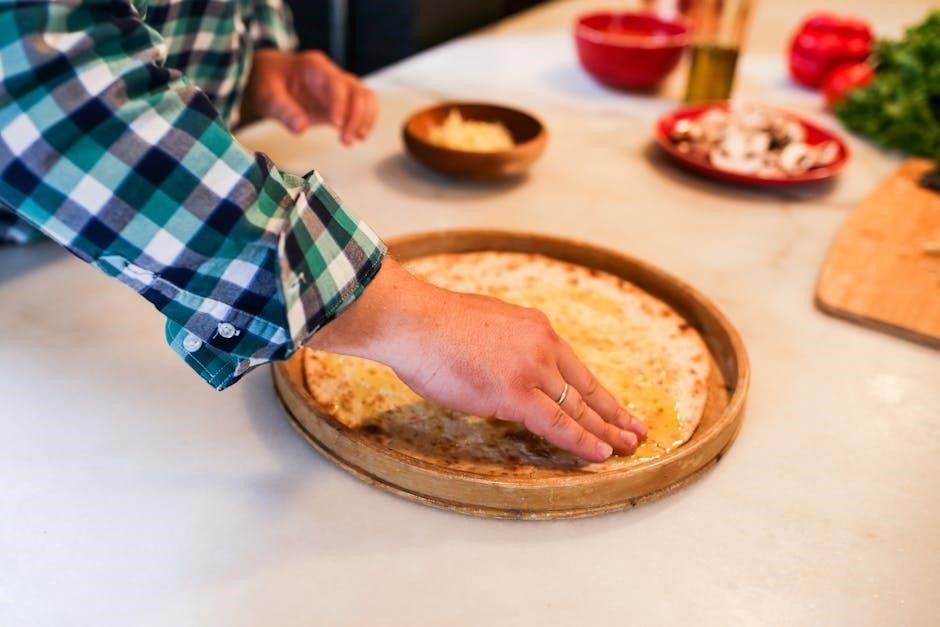
Shaping the Pizza Dough
Gently transfer the proofed dough to a lightly floured surface. Begin shaping by gently pressing and stretching the dough outwards, working from the center. Avoid using a rolling pin if you desire a rustic, airy crust, as it can compress the dough.
For a thinner crust, stretch further. If the dough resists, let it rest for a few minutes before continuing. Aim for a consistent thickness, leaving a slightly thicker edge for the crust. Proper shaping is key to achieving your desired pizza style and texture, ensuring a delightful bite every time.
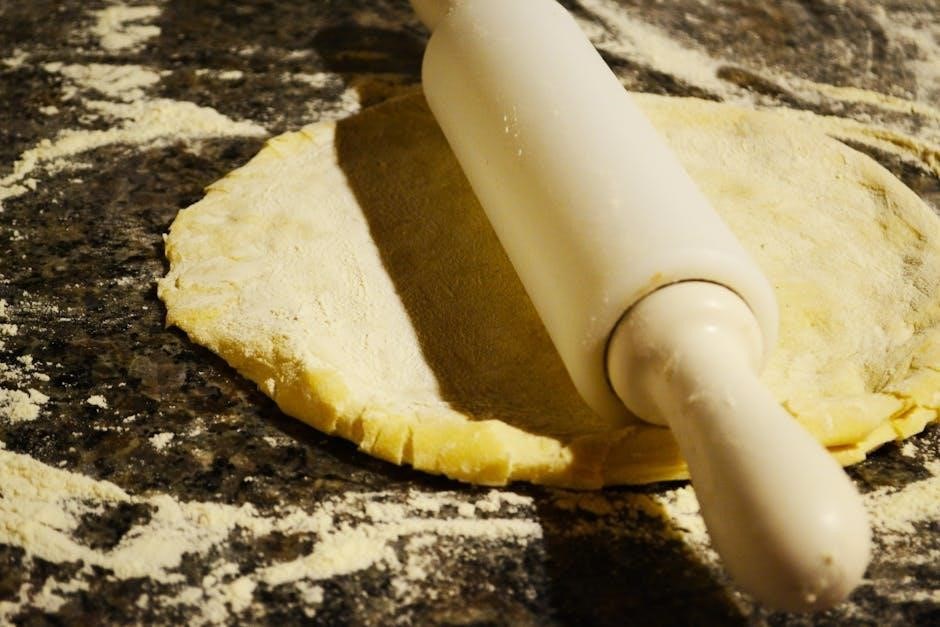
Hand-Stretching vs. Rolling Pin Methods
Hand-stretching preserves the air pockets created during fermentation, resulting in a light and airy crust with a delightful chew. This technique requires patience and gentle manipulation, coaxing the dough outwards with your fingertips and the heels of your hands.
Conversely, a rolling pin compresses the dough, yielding a denser, more uniform crust. While quicker, it sacrifices some of the texture and flavor complexity achieved through hand-stretching. For a truly artisanal pizza, embrace the hand-stretch method – it’s worth the effort!
Achieving the Desired Crust Thickness
Crust thickness is a matter of personal preference! For a Neapolitan-style, ultra-thin crust, stretch the dough to approximately 12 inches. A New York-style pizza benefits from a slightly thicker base, around 14-16 inches in diameter.
Control is key: Gently stretch from the center outwards, leaving a slightly raised edge for a beautiful, puffy rim. Consistent pressure ensures even thickness. Remember, practice makes perfect! Don’t be discouraged if your first attempt isn’t flawless – each pizza is a learning experience.
Preventing Dough Retraction During Shaping
Dough elasticity can be challenging! If the dough keeps springing back, allow it to rest for 5-10 minutes. This relaxes the gluten, making it easier to stretch. Lightly flour your work surface and hands to minimize sticking and resistance.
Gentle handling is crucial: Avoid aggressive stretching or pulling, which can cause tearing. Use your knuckles and the backs of your hands to gently coax the dough into shape. A little patience goes a long way in achieving a beautifully formed pizza base without frustrating retraction.
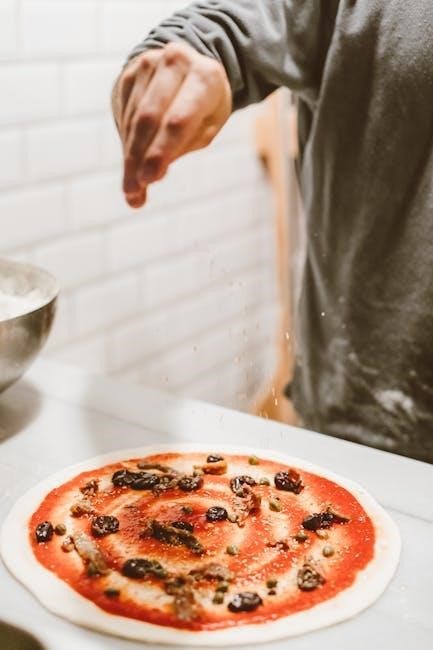
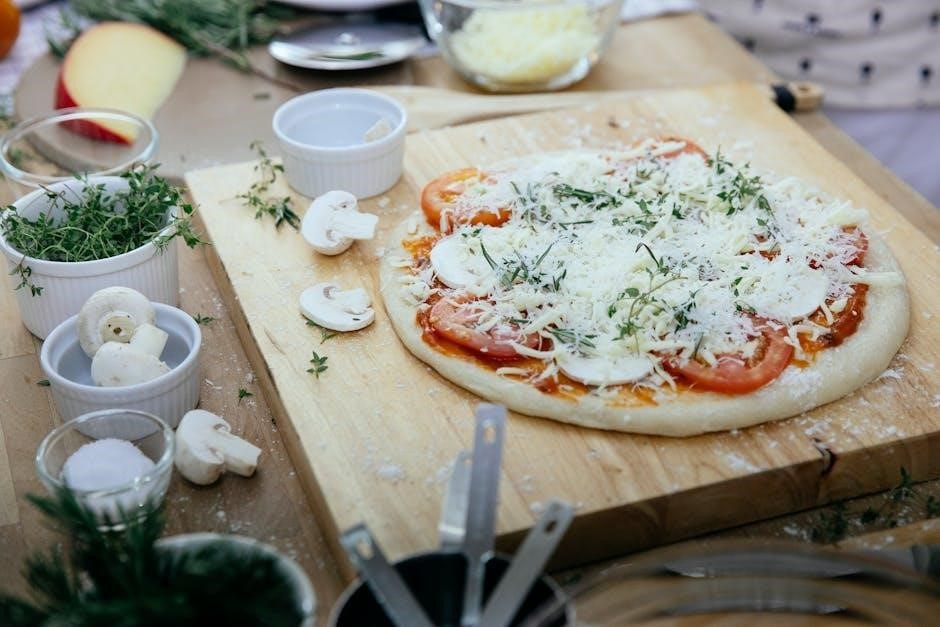
Topping & Baking Instructions
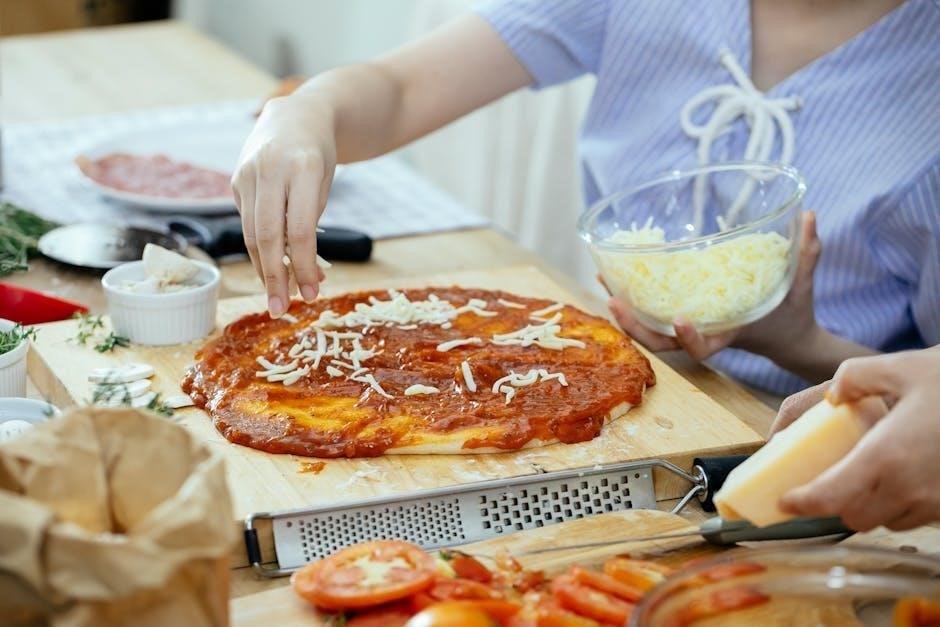
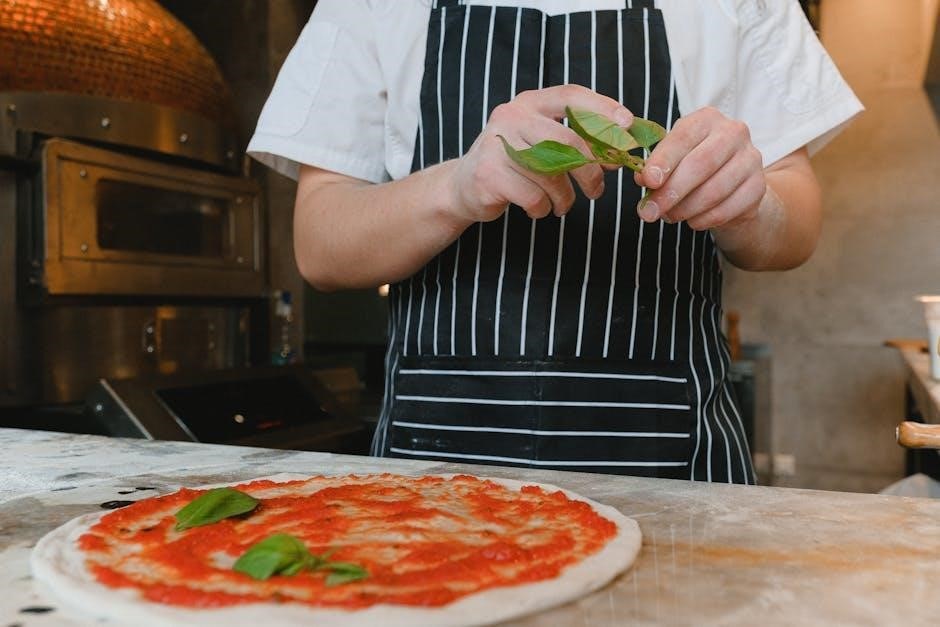
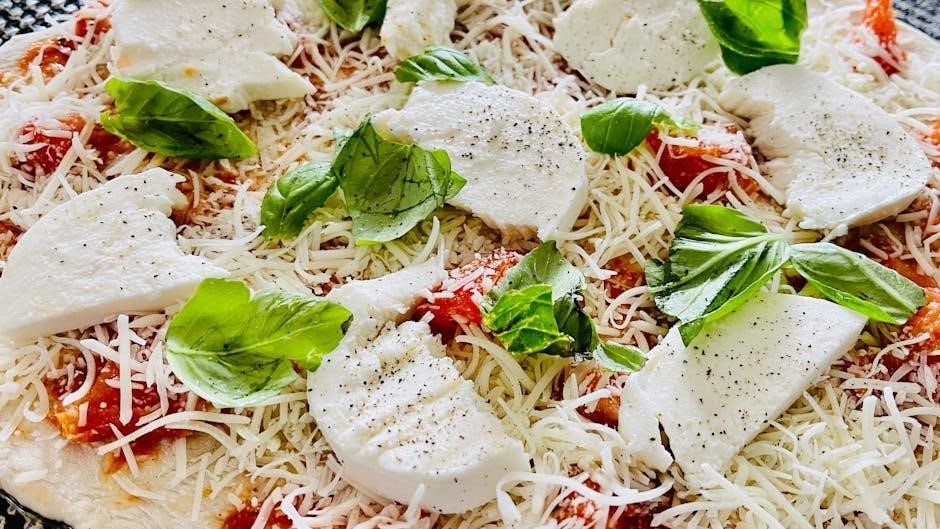
Elevate your pizza with quality toppings! Begin with a flavorful sauce, applied sparingly to avoid a soggy crust. Opt for high-quality cheeses – mozzarella is classic, but explore provolone or parmesan for added depth. Distribute toppings evenly, avoiding overloading any single area.

Baking is key to perfection! Preheat your oven to a high temperature, ideally between 450-500°F (232-260°C). Bake for 12-15 minutes, or until the crust is golden brown and the cheese is bubbly and slightly browned. A pizza stone or baking steel enhances crispness.
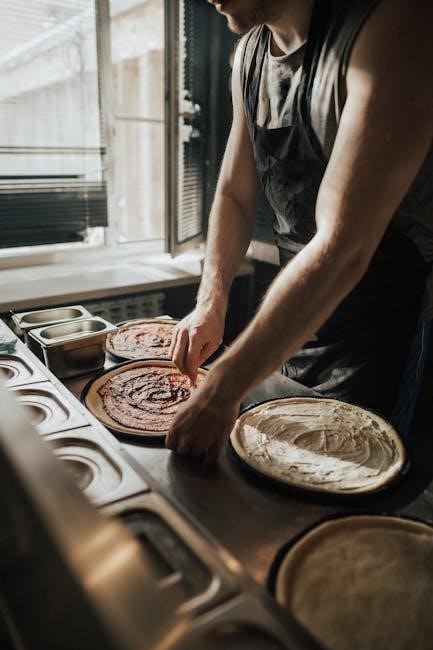
Sauce Selection & Application
Choosing the right sauce is crucial! A simple, high-quality tomato sauce forms the foundation of a great pizza. Consider options like marinara, crushed tomatoes, or even a pesto base for variety. Avoid overly watery sauces, as they can lead to a soggy crust.
Application is key to balance! Spread the sauce thinly and evenly across the dough, leaving a small border for the crust. Resist the urge to over-sauce; a light layer allows the other flavors to shine. Approximately half a cup of sauce is usually sufficient for a 12-inch pizza.
Cheese Choices & Distribution
Selecting the perfect cheese elevates your pizza! Mozzarella is the classic choice, offering a delightful stretch and mild flavor. However, don’t be afraid to experiment with provolone, parmesan, or even a blend for complexity. Whole milk mozzarella generally melts better than part-skim.
Even distribution is essential! Sprinkle the cheese evenly over the sauce, ensuring coverage without overcrowding. A generous, but not excessive, layer allows for optimal melting and browning. Consider adding dollops of ricotta or crumbled feta for bursts of flavor and texture.
Optimal Baking Temperatures & Times
High heat is key for a crispy crust! Preheat your oven to the highest possible temperature, ideally between 450°F (232°C) and 500°F (260°C). A pizza stone or baking steel preheated for at least 30 minutes will yield superior results, mimicking a professional pizza oven.
Baking time varies based on temperature and crust thickness. Generally, bake for 8-15 minutes, checking frequently after 8 minutes. The crust should be golden brown and the cheese bubbly and slightly browned. Rotate the pizza halfway through baking for even cooking.
Troubleshooting Common Dough Issues
Sticky dough? Resist adding too much flour! Lightly flour your work surface and hands. If persistently sticky, a brief rest can help gluten relax. Dough not rising? Ensure your yeast is fresh and activated properly. Warmth is crucial – proof in a warm, draft-free location.
Tough crust? Over-kneading develops too much gluten. Gentle handling and proper hydration are vital. Allowing sufficient rise time also prevents a dense, tough texture. Remember, patience is key to a perfect, tender crust!
Dough Too Sticky? Solutions
Addressing sticky dough requires finesse, not frantic flour addition! Initially, lightly flour your work surface and hands – a little goes a long way. Avoid incorporating excessive flour directly into the dough, as this can lead to a tough final product.
If stickiness persists, allow the dough a brief 10-15 minute rest. This allows the gluten to relax, making it more manageable. Gentle handling is paramount; resist the urge to aggressively work the dough. A slightly sticky dough often yields a chewier, more desirable crust!
Dough Not Rising? Causes & Fixes
A lack of rise can be disheartening, but often easily remedied! First, ensure your yeast is active. Proof it in warm (not hot!) water with a pinch of sugar – it should foam within 5-10 minutes. Temperature is crucial; a cold environment inhibits yeast activity. Find a warm, draft-free spot for proofing.
If the dough still doesn’t rise, consider the flour. Old or improperly stored flour can lack the necessary gluten development. A second, longer proofing time might be necessary, potentially up to an hour. Patience is key for a light and airy crust!
Crust Too Tough? Prevention & Remedies
A tough crust often stems from overworking the dough, leading to excessive gluten development. Gentle kneading is vital; aim for a smooth, elastic texture, not a rigid one. Insufficient hydration can also contribute – ensure accurate liquid measurements. Allowing adequate resting time is crucial for gluten relaxation.
If your crust is already tough, lightly brush it with olive oil after baking to soften it slightly. For future attempts, consider reducing kneading time and increasing hydration. A longer, slower rise can also improve tenderness, yielding a more enjoyable pizza experience.
Variations & Flavor Enhancements
Elevate your pizza dough with exciting flavor profiles! Incorporate dried herbs like oregano, basil, or rosemary directly into the dough during mixing for an aromatic crust. A touch of garlic powder or red pepper flakes adds a subtle kick. Experiment with different flour types – whole wheat offers a nuttier flavor and texture.
Consider using infused oils, such as garlic-infused olive oil, for added depth. Don’t be afraid to explore! A sprinkle of parmesan cheese within the dough itself can create a delightful cheesy undertone. These simple additions transform a classic dough into something truly special.
Adding Herbs & Spices to the Dough
Infuse your pizza crust with delightful aromas and flavors! Incorporating dried herbs and spices directly into the dough is remarkably simple. Typically, 1-2 teaspoons of dried herbs – oregano, basil, rosemary, or Italian seasoning – are sufficient for a standard dough batch. Add them during the initial mixing stage, ensuring even distribution.
For a subtle heat, consider a pinch of red pepper flakes or garlic powder. Experiment with smoked paprika for a smoky depth. Remember that dried herbs are more concentrated than fresh, so adjust accordingly. This technique elevates the entire pizza experience, creating a more complex and satisfying flavor profile.
Whole Wheat vs. All-Purpose Flour Options
Choosing the right flour impacts your pizza’s texture and nutritional value! All-purpose flour yields a lighter, chewier crust, ideal for classic pizza styles. Whole wheat flour, however, provides a nuttier flavor and denser texture, boosting fiber content.
For a balanced approach, consider a 50/50 blend of both flours. This offers a compromise between lightness and nutritional benefits. Whole wheat dough may require slightly more hydration due to its absorbent nature. Experiment to find your preferred ratio – a touch of whole wheat adds character, while all-purpose ensures a reliably tender crust.
Experimenting with Different Oils
Oil plays a crucial role in dough elasticity and flavor! Traditional olive oil imparts a classic Italian taste and contributes to a tender crust. For a more subtle flavor, consider using avocado oil or a light vegetable oil. Each oil influences the final product differently.
Don’t be afraid to explore! Infused oils, like garlic or herb-infused olive oil, can add an extra layer of complexity directly into the dough. Remember that the oil content affects the dough’s texture; too much can make it greasy, while too little can result in a dry crust.
Storage & Reusing Leftover Dough
Maximize your dough’s potential and minimize waste! Refrigerating leftover dough extends its usability for up to three days. Ensure it’s tightly sealed in an airtight container to prevent drying. For longer storage, freezing is ideal – portion the dough, wrap securely, and it can last for months.
Reviving frozen dough is simple! Thaw it slowly in the refrigerator overnight. Allow the dough to come to room temperature before shaping, as cold dough is harder to work with. Properly stored dough retains its flavor and texture, offering convenience and reducing food waste.
Refrigerating Dough for Later Use
Preserve freshness and convenience! Refrigerating Whole Foods pizza dough is a fantastic way to enjoy homemade pizza on your schedule. After the initial rise, gently punch down the dough to release air. Then, form it into a ball and place it in a lightly oiled bowl, turning to coat.
Seal tightly! Cover the bowl with plastic wrap or a lid, ensuring an airtight seal to prevent drying and flavor absorption. Refrigerated dough can be used within 72 hours, offering flexibility for weeknight dinners or weekend baking. It will continue to develop flavor while chilling.
Freezing Dough for Long-Term Storage
Extend the pizza possibilities! Freezing Whole Foods pizza dough allows for convenient, future pizza nights. After the first rise, divide the dough into desired portion sizes for individual pizzas. Shape each portion into a ball and wrap tightly in plastic wrap, ensuring no air pockets remain.
Double protection is key! Place the wrapped dough balls into a freezer-safe bag or container. Properly frozen dough can last for up to three months. When ready to use, thaw overnight in the refrigerator before shaping and baking, allowing for a gradual and optimal rise.
Reviving Cold Dough for Baking
Bring your dough back to life! Whether refrigerated or thawed from frozen, cold dough requires a little patience to regain its elasticity. Remove the dough from the refrigerator and let it sit at room temperature for at least 30-60 minutes, or until pliable.
Gentle handling is crucial. Gently knead the dough for a few minutes to redistribute the yeast and warm it up. This step reactivates the gluten, resulting in a lighter, airier crust. Avoid over-kneading, as this can make the dough tough. Now it’s ready for shaping and baking into your perfect pizza!